Demo

For ordinary custom prefabs a single mesh usually works just fine.
But the Custom Connection Prefab system can also be used for other purposes and sometimes a custom crossing can be too complex to build with one model. This usually is the case when connections on different height levels are involved.
In this case building the custom prefabs separately can be more efficient. Afterwards you can drag both prefab in the scene, add one of two as a child to the other prefab and update the prefab (top menu > GameObject > Apply Changes To Prefab). When instantiating the parent prefab both prefabs will be added to the scene and both will be fully functional.
It is recommended to keep the original prefab that was used as a child just in case you want to make changes to it in a later stage.
This residential area type of crossing can be used by itself. However for this purpose we also wanted to bring a sewer system to the map. Note that the sewer prefab itself was put together quickly adn mainly serves as an example of how else you can use this tool.
The setup
The crossing and the sewer system are two different prefabs for which connections were set up separately. After that was done the "X Crossing RA Sewer" object was added as a child to the crossing prefab like explained above.
How to create this in an efficient way in the scene?
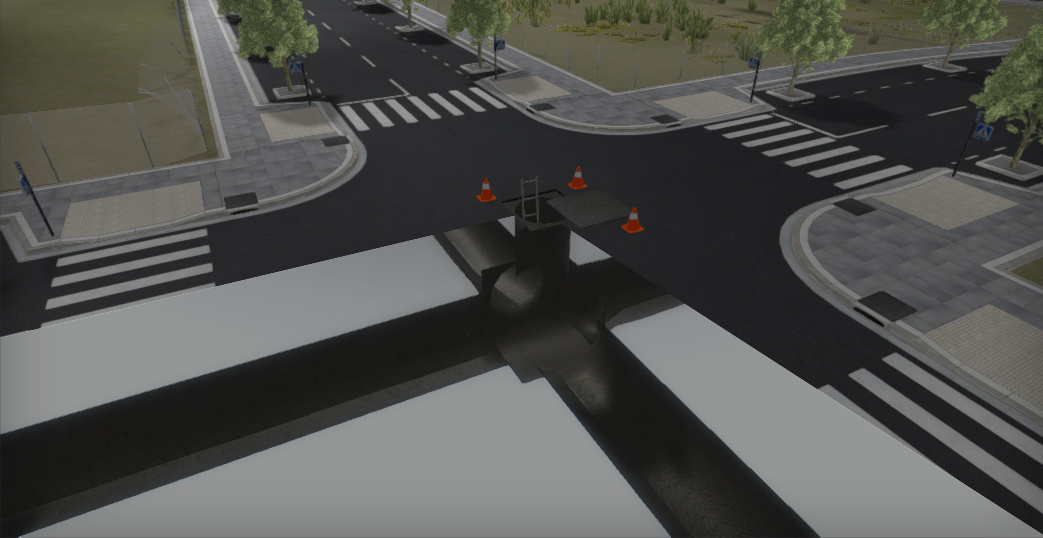
After activating the "RA Zone" local grid (General Settings > Scene Settings > Local Grids, near the bottom, or the L key) we dropped 4 crossings in the scene. They will snap automatically to the desired local grid points. We moved the sewerTop child object a little bit aside to create the opening to the sewer area.
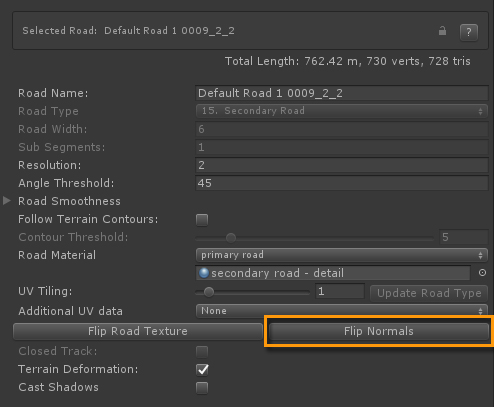
Next we disabled the terrain object to make the sewer connections clearly visible. The sewer pipelines were simply pulled out of a connection and snapped to the connection on the other end in one move holding the left mouse button down. For the sewer pipelines we want the normals to point inwards. To achieve that, select the road and in the Inspector click the "Flip Normals" button next to "Flip Road Texture".
After creating all the sewer pipelines the terrain can be activated again and all road sections can be created between the crossing connections. Again, simply pull out a new road section from a connection and snap it to the connection on the other end in one go.
Additional Notes
By default the terrain will be visible at the sewer hole. There are several packages on the asset store that can create holes in a terrain.
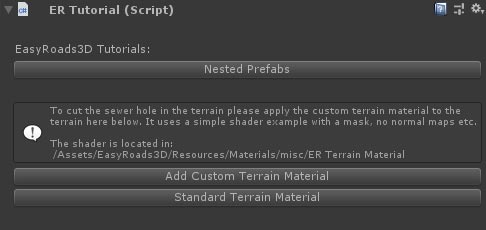
This demo project provides a simple example using masking and a custom terrain shader. The mask game object is added to the connection prefab as a child. Use the following material as a custom material on the terrain object: /Assets/EasyRoads3D/shaders/Misc/ER Terrain Material. Note that this shader currently does not work well with the ER Road transparancy shader and does not include normal map options. The material can be assigned quickly from the "Nested Prefabs" Tutorial component
In this scene the sewer hole is located in an area with no direct sun light as a simple hack to deal with the lighting difference.
Support for holes in the Unity terrain object is expected to arrive in Unity 2019.3. No custom material will be required.

