
Bridges can be created with the side object system. Both the Procedural as the Mesh Object type can be used for this. Bridges could also be created as part of the road geometry through the custom connection prefab system.
Which of these options is more suitable depends on the bridge type.
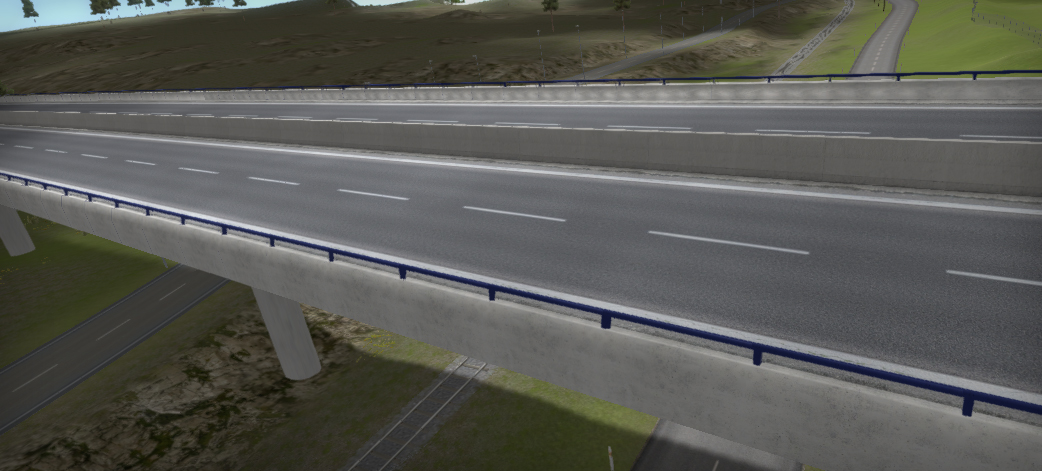
Mesh Type of bridges are instances of mesh models, the road shape should exactly follow the bridge (usually flat / horizontal). The advantage is that you can model the full bridge exactly as you want. They are slightly more complicated to set up in the SO manager as explained below and they are at the moment not scalable to different road widths.
Procedural bridges will be generated along the track in any direction, are easier to use in the scene and are scalable to different road widths. But there are some rules regarding the geometry so start / end segments can be generated accurately and they shouldn't be too complex with vertices close to each other unless they will be generated over a straight segment. The reason for this is that in bends outer vertices will stretch and inner vertices will squeeze together. This may not have the desired effect when vertices are already near to each other. Try the medieval bridge example on segments with bends.
Custom Connection prefab bridges are easy to use in the scene, but the bridge and road geometry will be part of the same mesh so the setup needs attention with regard to terrain deformation as explained further below.
Under Construction
Side Object Setup
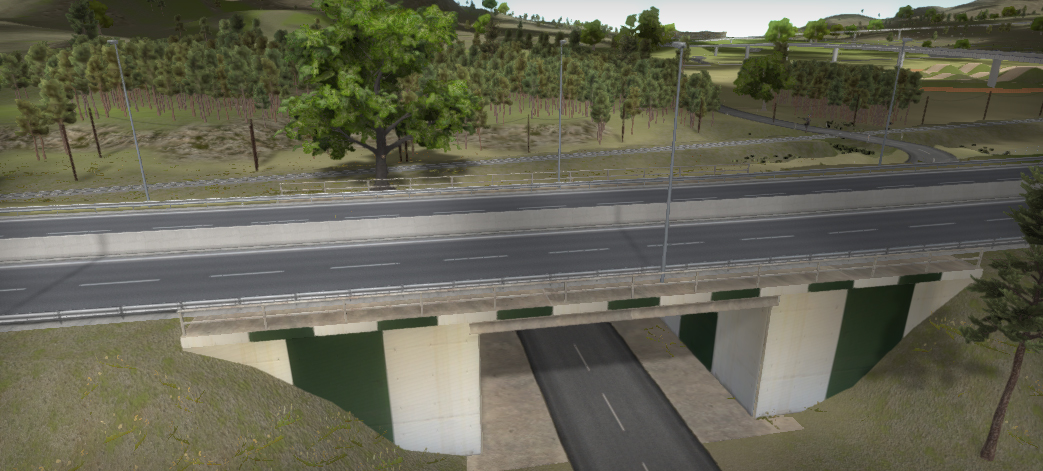
This bridge is a Procedural Mesh side object.
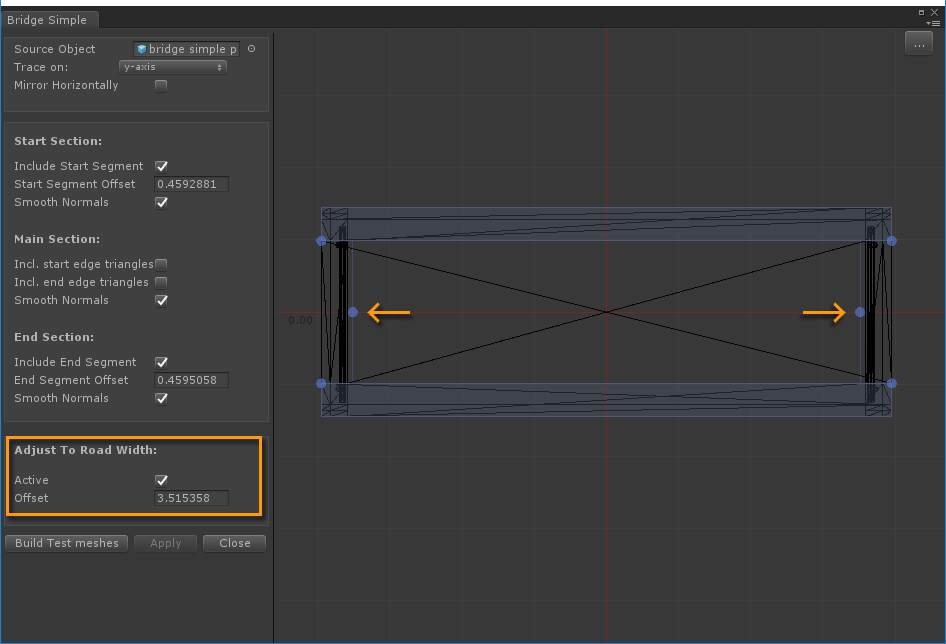
The source mesh includes start / end segments, similar as most of the procedural side objects discussed here. Also note that "Adjust To Road Width" in the mesh Editor window is active. Just like with Start / End Offsets the blue Offset Handle can be dragged, horizontally this time. The area inside the handle positions represents the position of the road relative to the bridge. The width of the bridge will auto adjust to the road width in a way that the area outside the handle offsets will be positioned resp. just on the left side of the road and just on the right side of the road.
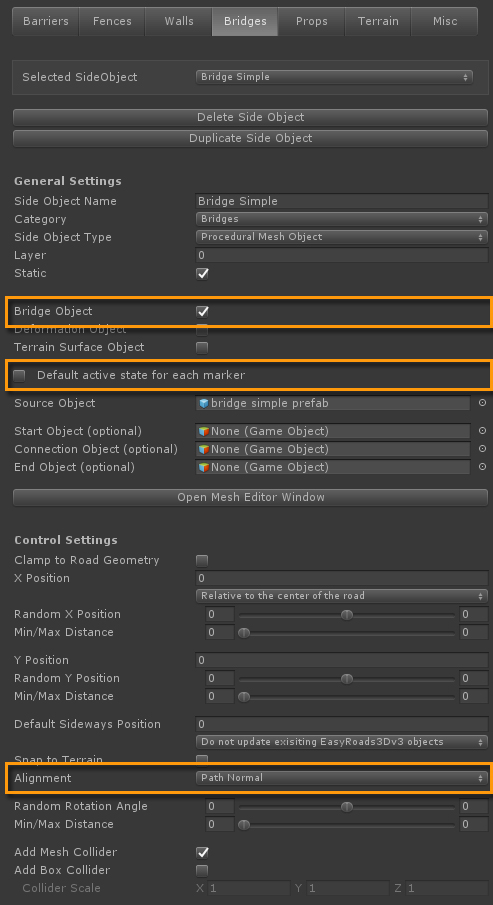
"Bridge Object" is toggled on. This will auto switch off terrain deformation for the bridge segment. "Default active state for each marker is switched off" because in general this bridge will be inactive along the road. It is easier to activate the bridge for those markers when necessary then having to deactivate it for all other markers. The Alinment is set to "Path Normal", that way the bridge will always align with the road, also when tilting is involved.
To create ther pillars, the pillar game object is added to the "Connection Object" slot. Objects assigned to this slot will be spawned on every X repeated mid sections depending on the ratio value. In this case a value of 8 is used which results in pillars every 16 meters.
Adding the bridge in a scene
In the demo scene the bridge Simple side object is active on Motorway 1.
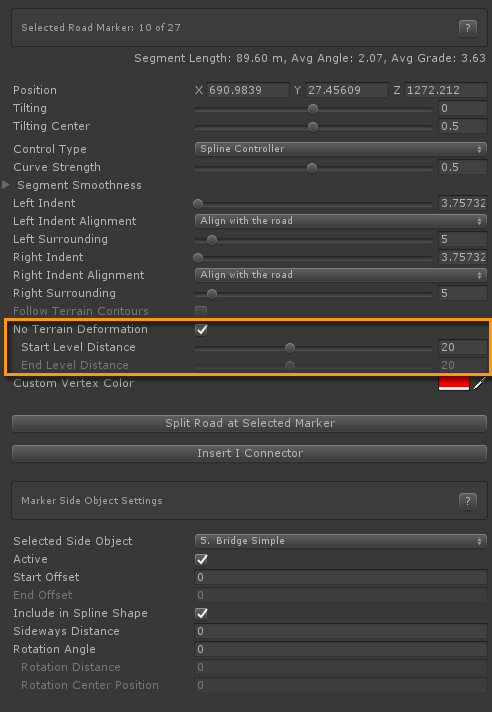
The bridge starts for example at marker 10, "No Terrain Deformation" is automatically toggled on because the side object is marked as a "Bridge Object " in the Side Object Manager. The result is that the terrain will keep the original shape for marker sections with this bridge side object active. In this case we used a Start level Distance of 20. This will gradually flatten the terrain over 20 units from the road height to the original terrain height below the road. The End Level Distance works similarly and can be set on the last marker for this segment, marker 12.
Adjusting the position of Pillar instances
A useful feature to mention here is the option to fine tune the position of instantiated objects, the bridge pillars in this case.After refreshing this side object (select the road > in the Side Object section activate the "Bridges" tab> activate the "Bridge Simple" foldout> press "Refresh Side Object") you will see that the pillars are positioned on the train rail for example and / or the bike track. These pillar positions can be fine tuned individually.
Click "Select Object in Hierarchy" > select the "Bridge Simple" child object > all pillars are added as childs to this game object..
Select the pillar you want to move. In the Inspector you will see the checkbox "Snap to Road". This will snap the pillar to the center of the road when moving it. This is what you want in this case, the pillar can be repositioned quickly to a more suitable place. In the case the side object is aligned relative to the left or right side of the road you can keep "Snap to Road" switched off. The transform orientation points in the direction of the road so you can still move the object aligned with the road over shorter distances.

